Integration with React Native
This guide walks you through integrating the X3M SDK in a React Native app, from prerequisites to initialization.
If you're migrating from another ad mediation platform (like AppLovin MAX), check out our Migration Guides for step-by-step instructions to make the transition smooth.
Prerequisites
- React Native:
0.76or later - Android:
- Min SDK Version
23or higher - Compile SDK Version
34or higher - Android Gradle Plugin
8.6.1or higher
- Min SDK Version
- iOS:
- Xcode
16.2or higher. - iOS
13.0or higher.
- Xcode
Check the React Native blog for more information if you need to upgrade your React Native version.
Get Your Configuration
Once the application is registered in the system and its status is set to RUNNING, the configuration details can be obtained. These details will be used when setting up ads in the application.
To obtain this configuration, log in with your credentials to the admin panel. Navigate to Applications click on the name of the application you're integrating
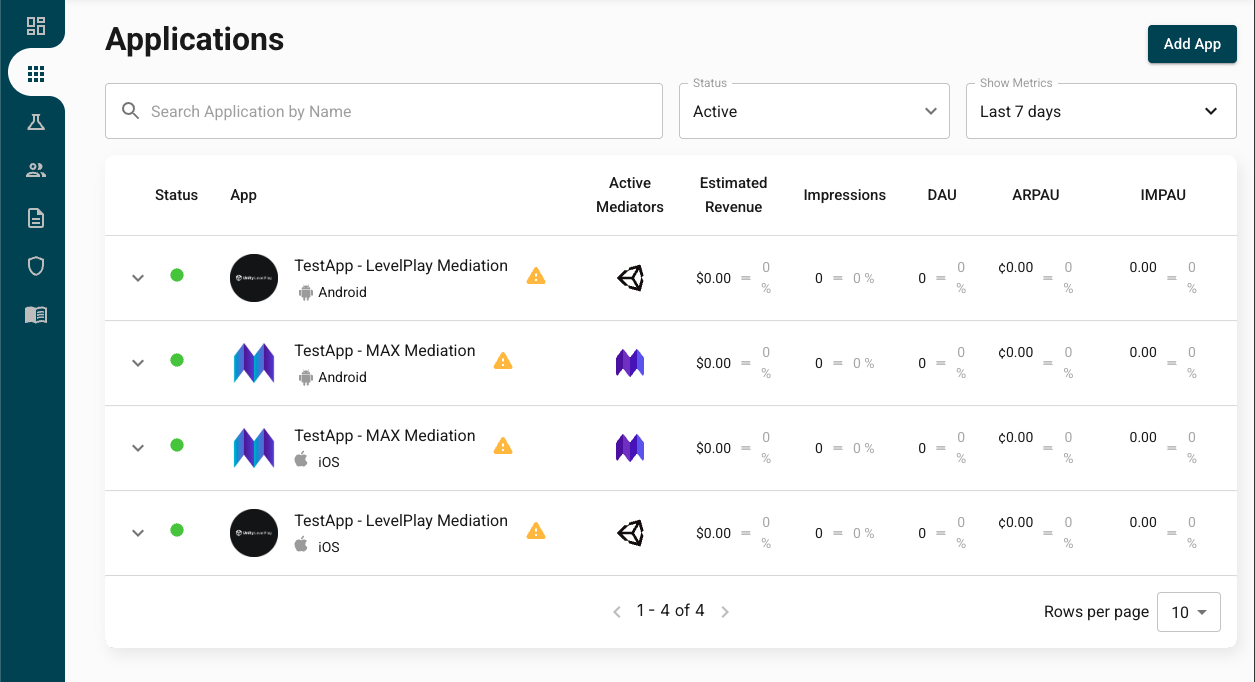
After clicking on the name of the application you'll find the information in the App Details tab.
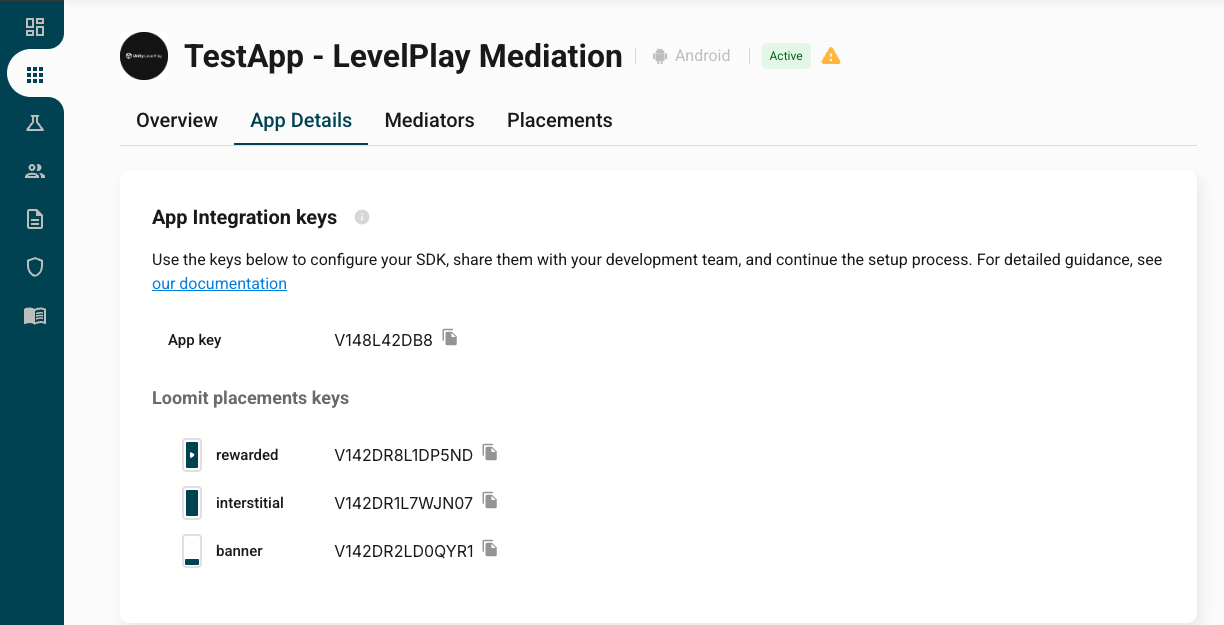
If the application is not yet in the RUNNING status, the integration can be performed using the test IDs. Once the application is configured, replace the test IDs with the production IDs obtained in this step.
Add X3M SDK and Loomit Adapters
Add the npm package
Add the react-native-xmediator package to your app.
- from remote URL
- using npm
yarn add https://react-native-artifact-registry.x3mads.com/react-native/react-native-xmediator-0.4.0.tgz
npm install https://react-native-artifact-registry.x3mads.com/react-native/react-native-xmediator-0.4.0.tgz
We're working on adding the package to the npm registry. Please be patient 🙏.
Choose Mediators and Networks
Pick the ad networks and mediators you want to add to your app.
If you're looking to integrate an ad network that isn't currently listed, please contact our team or your account representative to discuss support and integration options.
Initialize the SDK
Wrap your application with the XMediatorProvider.
import { XMediatorProvider } from "react-native-xmediator";

export default function App() {
  return (
    <XMediatorProvider
      appKey={"<YOUR_APP_KEY>"}
      initSettings={{
        userProperties: {
          userId: "<your-user-id>",
          customProperties: {
            key1: "initialValue",
            key2: 100,
            key3: true
          }
        }
      }}
      // other props
    >
      {/* your app code... */}
    </XMediatorProvider>
  );
}
XMediatorProvider has an autoInitialize prop (default: true). If you set it to false, use the useInitialize hook to trigger initialization manually.
Update User Properties
After the SDK has been initialized, you can update the user properties (and custom properties) at any time. You may modify, add, or remove properties as needed.
To ensure you do not overwrite the entire configuration, always follow these steps:
- Retrieve the current user properties.
- Edit only the properties you want to change using the editor.
- Pass the updated properties to
setUserPropertiesto apply your changes.
Below you can see how to do this:
Implementation
Use the useUserProperties hook to manage user properties:
import { useUserProperties } from 'react-native-xmediator';

const { getUserProperties, setUserProperties } = useUserProperties();

// Get current properties
const currentProperties = getUserProperties();

// Update specific properties
setUserProperties({
  ...currentProperties,
  userId: "new-user-id",
  customProperties: {
    ...currentProperties.customProperties,
    // Modify existing property
    key1: "updatedValue",
    // Remove key2 by setting it to undefined
    key2: undefined,
    // Add new property
    key4: ["new1", "new2"],
    // key3 remains unchanged (kept via ...currentProperties.customProperties)
  }
});